Parameterized Cell Tutorial - How to Create a Pcell
Parameterized Cells ( Pcell ) are a powerful tool to create Cadence layout designs.
This Tutorial gives step by step instructions of how to create a Pcell for comb
drive fingers and how to instantiate this finger Pcell to create a comb drive.
In a later tutorial, we will also use this Pcell to create a mesh for metal
membrane designs. This tutorial assume you have set up and started
Cadence properly. This tutorial is process independent. However if you choose to skip steps, pre-created tutorial Pcells exists in hp_cds (MOSIS HP
0.5um process).
Part I. Initialize Pcell environment
Part II. Draw basic geometry
Part III. Define parameters
Part IV. Compile Pcell
Next: How to instantiate this Pcell
Part I. Initialize Pcell environment
- Let's start with a new "pcell_demo" layout in a new "demo_lib" library. Please refer to Layout
Edit Help on how to create a new library and how to create a new layout.
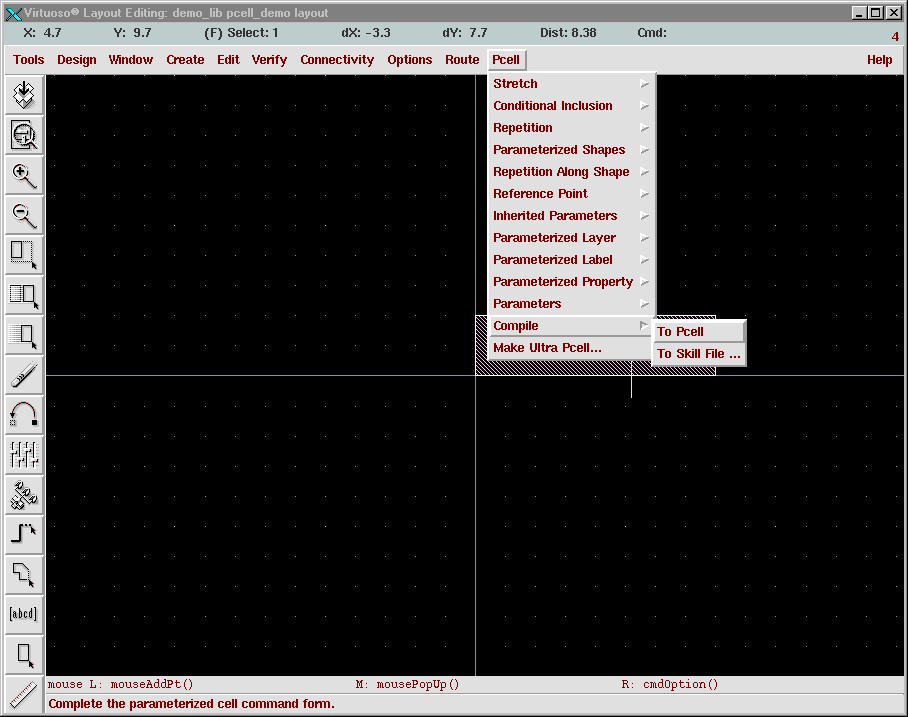
- In layout window, click on Tools => Pcell
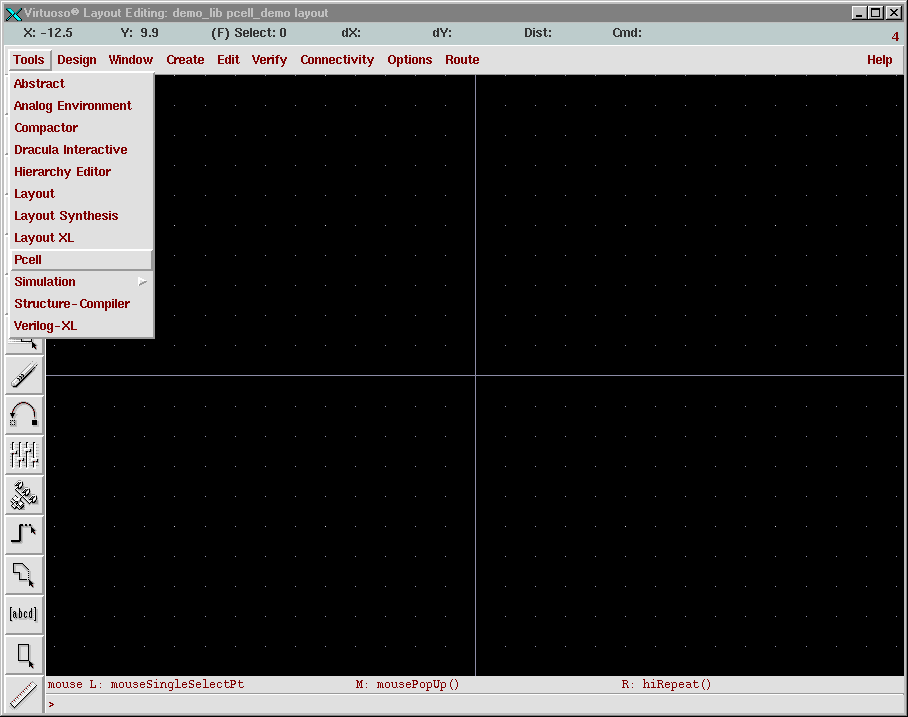
- A new menu Pcell will show up on the top menu bar.

The Pcell menu indicates this is a Pcell layout instead of a
regular layout.
Part II. Draw basic geometry:
- To draw basic geometry is the same way to draw a regular layout. In this
case, we start with a finger that is 2um wide and 8um long.
- Draw 8um by 2um rectangle (with Metal3 for hp_cds; for other process, choose the proposed structure layer)

Part III. Define parameters
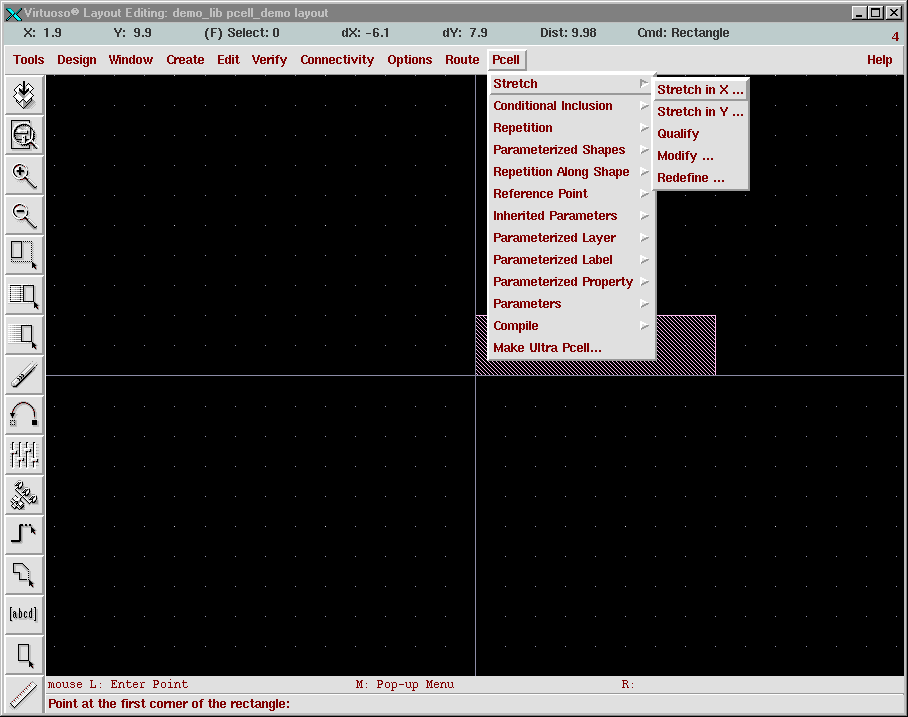
- First, define "finger_length" parameter. Click on Pcell =>
Stretch => Stretch in X ...
- In the layout window, click once to define the starting point of the
stretch line; drag the stretch line; and then double click to define
ending point of the stretch line.

- A Stretch in X window will pop up:
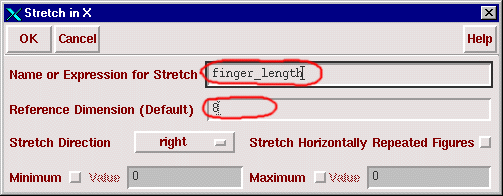
Type in finger_length as the parameter name; keep the default
dimension as 8 (same as the length of rectangle we drew); then
click OK.
Red circle indicates user input.
- Next, let's define "fingers" parameter (number of fingers that needs to be
repeated in y direction). Click Pcell => Repetition => Repeat in
Y ...

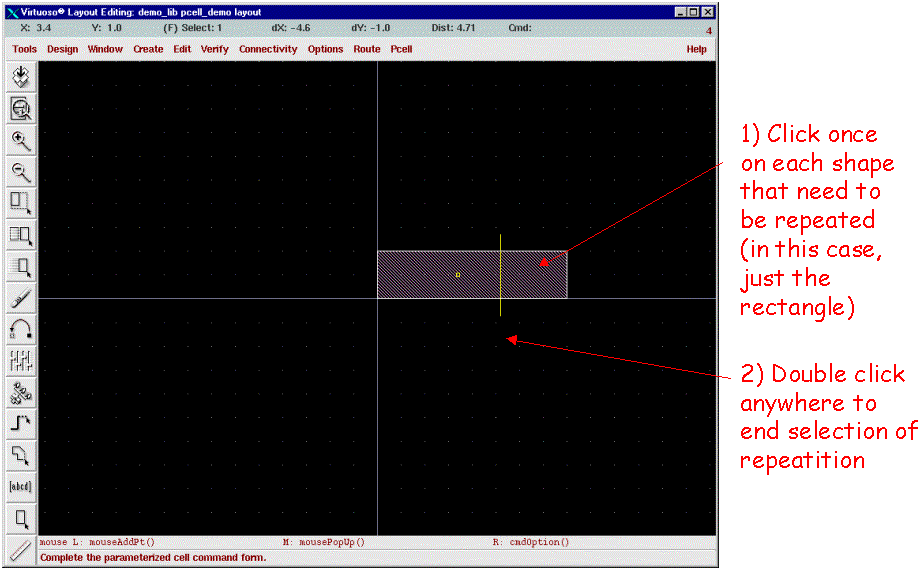
- Click once on each shape that need to be repeated (in this case, just the
rectangle); then double click anywhere to end selection of repetition
- Repeat in Y window pops up:
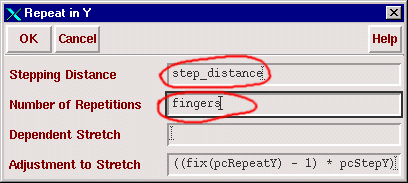
Type in step_distance as the parameter name for Stepping
Distance; Type in fingers as the parameter name for Number of
Repetitions; click OK.
Red circle indicates user input.
- Now you have successfully defined a Stretch in X, and a Repetition in Y.
Part IV. Compile Pcell
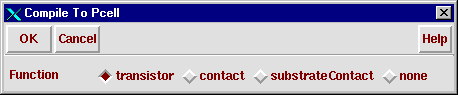
- The last step of designing a Pcell layout is to compile it. To compile a
Pcell, click on Pcell => Compile => To Pcell
- A Compile To Pcell window pops up, just click on OK.
- Now your Pcell is done. Don't forget to save your design by clicking Design
=> Save
After you complete your Pcell, the next step is to instantiate
this Pcell in a layout to create a comb drive.
Created September 17, 2001 by Kai He at khe@ece.cmu.edu